Beautiful macOS terminal in 5 minutes

Terminals are boring, but they don’t have to be. Working with beautiful terminals which match your personality is not everyone is going to relate to, but in my opinion these small things do matter in my opinion. I have been a software developer long enough to know that your environment matters whether physical or digital. While we may have to spend thousands of dollars to get the ideal desktop environment that we love, the cost of getting your digital space tidy is next to zero.
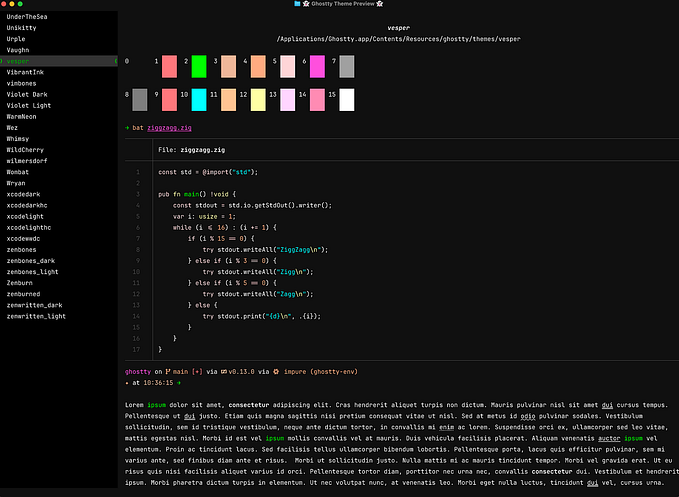
In this blog I’ll, take you step by step to make your terminal precisely above(or something better 🙂).
Pre-requisites:
The Baking process
Step 1: Install brew
Homebrew is a free package manger which is going to make your life easier beyond the scope of this tutorial as well. Run the following command:
/bin/bash -c "$(curl -fsSL https://raw.githubusercontent.com/Homebrew/install/HEAD/install.sh)"It might prompt you to install CLI tools for Xcode before installing brew: press return to allow it.
Note: At the end of the installation, it instructs you to add Homebrew to the PATH, you might skip it. Run the following to add brew to PATH:
echo 'eval "$(/opt/homebrew/bin/brew shellenv)"' >> ~/.zprofile
eval "$(/opt/homebrew/bin/brew shellenv)"
Step 2: Install iterm2
iterm2 gives you a lot of cool features in comparison to the default terminal that gets shipped with mac. You can head over to this link to install iterm2 or you can run following command to install it:
brew cask install iterm2Step 3: Install ZSH
By default macOS ships with zsh. If not install ZSH using brew:
brew install zshStep 4: Install Oh My ZSH
You will not know why you should use oh-my-zsh until you start using it. It is really helpful with zsh configuration(~/.zshrc).
sh -c "$(curl -fsSL https://raw.githubusercontent.com/ohmyzsh/ohmyzsh/master/tools/install.sh)"Step 5: Install starship
Last software that you need on your system before getting a beautiful terminal is Starship. Head over to https://starship.rs/guide/ to install it on your system.
Install a nerd font
There are a lot of cool fonts out there, I personally tend to pick the ones with ligatures support, because I invariably tend to use these fonts in vscode for my development work as well. I recommend you: Caskaydia Cove Nerd font, FiraCode font.
For my terminal usage I like to have a proper nerd font🤓, I recommend you to checkout ProggyClean Nerd font.
Step 6: Binding everything
If you head over to ~/.zshrcfile you would find a lot of configuration already added to it.
To tell your terminal to use starship add this at the end of ~/.zshrc:
# initialize starship
eval "$(starship init zsh)"
Before doing anything with starship onething you have to know is that starship picks up its configuration from ~/.config/starship.tomlfile. Now head over to starship presets, to choose how your terminal should look like. My personal favorites are:
- Tokyo night(the one at the top screen shot)
- Pastel powerline

Awesome thing about this is that you do not have to manually go and change your config file: you can simply run:
starship preset pastel-powerline > ~/.config/starship.tomlStep 7: (Optional) add a background image
Though not necessary, having a background that you love is a nice touch.
- Open your
iterm2, pressCommand+,: a settings window will open up. - Head over to
Profilessection - On the right side you will find a lot of tabs, move to
Windowtab - There will be a Background Image section; enable it. And pick any image from your desktop.

Conclusion
A lot of configuration is possible with starship. You can make your terminal look any way you want. I find the template presets good enough, so I stick with them
Thats all for today guys. Let me know what you think of this.

